
AR-15 Drawing: A Comprehensive Guide
When it comes to firearms, the AR-15 stands out as one of the most popular and versatile options available. Whether you’re a recreational shooter, a competitive marksman, or a law enforcement officer, understanding the AR-15 drawing process is crucial. In this article, we’ll delve into the intricacies of AR-15 drawing, covering everything from the basics to advanced techniques.
Understanding the AR-15

The AR-15 is a semi-automatic, gas-operated firearm that was originally designed for military use. It’s known for its lightweight, modular design, and ease of use. The “AR” in AR-15 stands for “ArmaLite,” the company that designed the original prototype. The “15” refers to the caliber of the ammunition it fires, which is typically .223 Remington or 5.56x45mm NATO.
One of the key features of the AR-15 is its modular design. This means that various components, such as the upper and lower receivers, can be easily swapped out to customize the firearm to your specific needs. This versatility has made the AR-15 a favorite among shooters and hunters alike.
The Basics of AR-15 Drawing
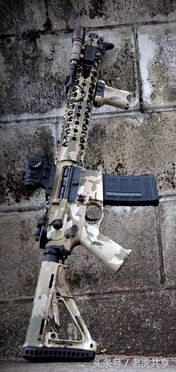
Before we dive into the drawing process, it’s important to understand the different parts of the AR-15. The most critical components are the upper receiver, lower receiver, barrel, and magazine. The upper receiver houses the barrel, sights, and action, while the lower receiver contains the trigger group and magazine well.
Here’s a step-by-step guide to the basic AR-15 drawing process:
- Secure the firearm in a safe, stable position.
- Remove the magazine from the magazine well.
- Check the chamber to ensure it’s clear of any ammunition.
- Grasp the firearm with both hands, using a firm grip.
- Depress the magazine release button on the bottom of the lower receiver.
- Slide the magazine out of the magazine well.
- Insert a new magazine into the magazine well.
- Ensure the magazine is fully seated and locked into place.
- Reacquire a firm grip on the firearm.
- Depress the bolt release lever on the left side of the upper receiver.
- Push the bolt forward to the open position.
- Check the chamber again to ensure it’s clear.
- Close the bolt by pulling it back to the closed position.
- Reacquire a firm grip on the firearm.
- Adjust the sights as necessary.
Advanced AR-15 Drawing Techniques

Once you’ve mastered the basic AR-15 drawing process, you can explore advanced techniques to improve your shooting performance. Here are a few tips:
- Practice Dry Firing: Practice drawing the AR-15 without live ammunition. This helps you become more familiar with the process and reduces the risk of an accidental discharge.
- Use a Red Dot Sight: Red dot sights provide a quick and easy way to acquire targets. They’re particularly useful for rapid fire and close-range engagements.
- Practice with Different Magazines: Familiarize yourself with different magazine types and ensure they’re properly seated in the magazine well.
- Keep Your Hands Close to the Body: This helps maintain control of the firearm and reduces the risk of a misfire.
- Use a Stopping Technique: When drawing the AR-15, use a technique that allows you to quickly stop the firearm after the shot is fired. This helps prevent follow-up shots and ensures you’re ready for the next engagement.
Table: AR-15 Drawing Components
| Component | Description |
|---|---|
| Upper Receiver | Houses the barrel, sights, and action. |
| Lower Receiver | Contains the trigger group and magazine well. |
| Barrel | Responsible for propelling the bullet out
由 google |