
Spray Painting an AR-15: A Comprehensive Guide
Are you looking to give your AR-15 a fresh look or protect its finish? Spray painting is a popular choice for both aesthetic and functional reasons. In this guide, we’ll delve into the process of spray painting an AR-15, covering everything from preparation to the final touches. Let’s get started!
Materials Needed

Before diving into the spray painting process, it’s essential to gather all the necessary materials. Here’s a list of items you’ll need:
| Item | Description |
|---|---|
| AR-15 | Your firearm, disassembled and cleaned. |
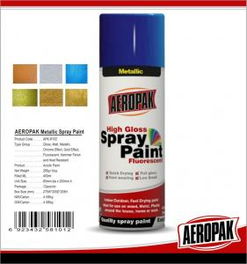
| Spray Paint | Choose a color that suits your preference. Ensure it’s compatible with metal surfaces. |
| Masking Tape | Used to protect areas you don’t want to paint. |
| Spray Gun | Choose a high-quality spray gun for better control and finish. |
| Paint Thinner | For cleaning the spray gun and paint. |
| Sandpaper | Used for surface preparation and smoothing out imperfections. |
| Drop Cloth | Protects the work area from overspray. |
Preparation

Proper preparation is key to achieving a successful spray painting job. Here’s a step-by-step guide to prepare your AR-15 for painting:
-
Disassemble your AR-15 and clean it thoroughly. Remove any dirt, grease, or oil that may be present on the surface.
-
Use sandpaper to lightly sand the areas you want to paint. This will help the paint adhere better to the surface.
-
Wipe down the sanded areas with a clean cloth to remove any dust or debris.
-
Apply masking tape to any areas you want to protect from paint, such as sights, handguards, or logos.
-
Set up your work area. Lay down a drop cloth to protect the floor and ensure you have enough space to work.
Painting Process
Now that your AR-15 is prepared, it’s time to start painting. Follow these steps to achieve a professional finish:
-
Load the spray paint into your spray gun. Be sure to follow the manufacturer’s instructions for the correct amount of paint and air pressure.
-
Practice spraying on a piece of scrap material to get a feel for the spray gun and the paint flow.
-
Start spraying from the top of the AR-15, moving in a steady, sweeping motion. Maintain a consistent distance from the surface to ensure even coverage.
-
Apply multiple thin layers of paint, allowing each layer to dry before applying the next. This will prevent runs and drips.
-
After the final coat has dried, remove the masking tape and inspect the finish. Touch up any areas that may need additional paint.
Finishing Touches
Once your AR-15 is painted, it’s time to apply the finishing touches:
-
Use a clean cloth to wipe down the painted surface, removing any dust or debris.
-
Reassemble your AR-15, ensuring all parts are functioning correctly.
-
Apply a clear coat to protect the paint and add an extra layer of durability. Allow the clear coat to dry completely before handling the firearm.
And there you have it! You’ve successfully spray painted your AR-15. Not only does it look great, but it’s also well-protected. Remember to follow all safety precautions when working with firearms and paint. Happy painting!
function pinIt() { var e = document.createElement('script'); e.setAttribute('type','text/javascript'); e.setAttribute('charset','UTF-8'); e.setAttribute('src','https://assets.pinterest.com/js/pinmarklet.js?r='+Math.random()*99999999); document.body.appendChild(e); }