
Spark AR Shader: A Comprehensive Guide for Creators
Are you a creator looking to enhance your augmented reality (AR) experiences with stunning visual effects? Look no further than Spark AR Shader. This powerful tool allows you to create custom shaders for AR effects, giving you the ability to craft unique and captivating visuals. In this article, we will delve into the various aspects of Spark AR Shader, providing you with a detailed and multi-dimensional introduction.
Understanding Spark AR Shader

Spark AR Shader is a software developed by Facebook for creating custom shaders in AR effects. It is designed to be user-friendly, making it accessible to both beginners and experienced developers. With Spark AR Shader, you can create shaders that can be applied to various AR objects, such as 3D models, images, and videos.
Shaders are programs that run on the GPU (Graphics Processing Unit) and determine how objects are rendered in a scene. By using Spark AR Shader, you can control various aspects of the visual appearance of your AR objects, such as color, texture, lighting, and shadows.
Getting Started with Spark AR Shader
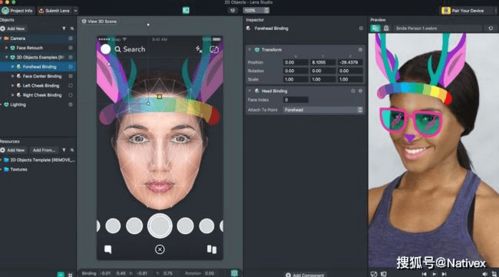
Before diving into the details of Spark AR Shader, it’s essential to have a basic understanding of the software and its interface. Here’s a step-by-step guide to help you get started:
- Download and install Spark AR Studio from the Facebook website.
- Open Spark AR Studio and create a new project.
- Select the “Shader” component from the library and drag it onto your project.
- Double-click the Shader component to open the Shader Editor.
The Shader Editor is where you will create and modify your shaders. It provides a visual interface that allows you to manipulate various parameters and see the results in real-time.
Exploring the Shader Editor

The Shader Editor is divided into several sections, each serving a specific purpose:
- Properties: This section allows you to control the basic properties of your shader, such as the color, opacity, and blending mode.
- Inputs: Here, you can define the inputs for your shader, such as textures, colors, and vectors.
- Outputs: This section defines the output of your shader, which can be used as a material for AR objects.
- Nodes: The Nodes section is where you will create and connect various operations to build your shader.
Each node represents a specific operation, such as a color blend, texture mapping, or lighting calculation. By connecting these nodes, you can create complex shaders that produce unique visual effects.
Creating Custom Shaders
Now that you have a basic understanding of the Shader Editor, let’s explore how to create custom shaders:
- Open the Shader Editor and select the “Create Node” button.
- Choose the type of node you want to add to your shader, such as a color blend or texture mapping node.
- Connect the inputs and outputs of the node to other nodes or properties in your shader.
- Adjust the parameters of the nodes to achieve the desired visual effect.
- Preview your shader in the AR preview window to see the results in real-time.
Here’s an example of a simple shader that applies a gradient color to an AR object:
| Node | Input | Output |
|---|---|---|
| Gradient | Color 1 | Color |
| Gradient | Color 2 | Color |
| Blend | Color | Output |
In this example, the “Gradient” node creates a gradient color based on two input colors. The “Blend” node then combines this gradient color with the original color of the AR object, resulting in a gradient effect.
Optimizing Your Shaders
Creating visually stunning shaders is just the beginning. To ensure that your AR effects run smoothly on various devices, it