
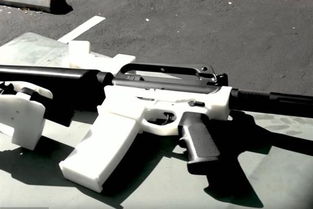
AR-15 Painting: A Comprehensive Guide for Enthusiasts
Are you an AR-15 enthusiast looking to add a personal touch to your firearm? Painting your AR-15 can be a rewarding and creative endeavor. Whether you’re aiming for a custom look or simply want to protect your rifle from the elements, this guide will walk you through the process step by step.
Choosing the Right Paint

When it comes to painting your AR-15, selecting the right paint is crucial. There are several types of paint available, each with its own advantages and disadvantages.
- Enamel Paint: This is a popular choice for its durability and glossy finish. It’s available in a wide range of colors and can be applied using various methods, including spray cans, brushes, and rollers.
- Epoxy Paint: Epoxy paint is known for its excellent adhesion and resistance to chemicals and solvents. It’s a great option if you’re looking for a long-lasting finish.
- Acrylic Paint: Acrylic paint is a versatile option that dries quickly and is easy to apply. It’s available in a variety of colors and finishes, including matte, glossy, and textured.
When choosing a paint, consider the following factors:
- Finish: Decide whether you want a glossy, matte, or textured finish.
- Color: Choose a color that complements your personal style or the intended use of your firearm.
- Application Method: Consider the method you’re most comfortable with, whether it’s spray painting, brush painting, or using a roller.
Preparation
Before you start painting, it’s essential to prepare your AR-15 properly. This ensures that the paint adheres well and provides a durable finish.
- Disassembly: Disassemble your AR-15 according to the manufacturer’s instructions. This typically involves removing the barrel, bolt carrier group, magazine, and any other removable parts.
- Cleaning: Clean all parts thoroughly to remove any dirt, grease, or oil. Use a solvent or cleaning solution specifically designed for firearms.
- Drying: Allow all parts to dry completely before painting.
- Protecting: Cover any parts you don’t want to paint with masking tape or a protective coating.
Painting Techniques
Once your AR-15 is prepared, it’s time to start painting. Here are some tips to help you achieve a professional-looking finish:
- Spray Painting: Use a high-quality spray gun and follow the manufacturer’s instructions for the paint you’ve chosen. Hold the gun at a consistent distance from the surface and apply even, overlapping strokes.
- Brush Painting: Use a high-quality brush and apply the paint in thin, even layers. Allow each layer to dry before applying the next.
- Roller Painting: Use a high-quality roller and apply the paint in long, even strokes. This method is best for large surfaces.
Finishing Touches
After your AR-15 is painted, it’s time to apply the finishing touches:
- Clear Coat: Apply a clear coat to protect the paint and give it a glossy finish. This step is especially important if you’ve used a brush or roller to apply the paint.
- Reassembly: Reassemble your AR-15 according to the manufacturer’s instructions, ensuring that all parts are properly aligned and functioning.
- Testing: Test your AR-15 to ensure that it’s functioning correctly and that the paint hasn’t affected any moving parts.
Table: Paint Comparison
| Paint Type | Finish | Adhesion | Resistance to Chemicals | Drying Time |
|---|---|---|---|---|
| Enamel Paint | Glossy | Excellent | Good
由 google |