
How to Make AR in Unity: A Detailed Guide
Augmented Reality (AR) has become a popular technology in recent years, offering a unique blend of the digital and physical worlds. Unity, a powerful game development platform, provides a robust set of tools for creating AR experiences. Whether you’re a beginner or an experienced developer, this guide will walk you through the process of making AR in Unity.
Setting Up Your Unity Project

Before you start creating AR in Unity, you need to set up your project. Here’s a step-by-step guide to get you started:
- Open Unity Hub and create a new project.
- Select the “3D” template and choose “AR Foundation” as the package.
- Name your project and click “Create Project” to generate the project files.
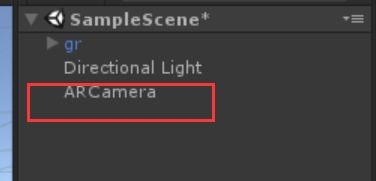
- Open the project in Unity Editor.
Once your project is set up, you’ll see a new folder called “AR Foundation” in the Project window. This folder contains all the necessary components for AR development.
Understanding AR Foundation
AR Foundation is a set of tools provided by Unity for building AR applications. It includes features like plane detection, tracking, and rendering. Here’s a brief overview of some key components:
| Component | Description |
|---|---|
| AR Session Origin | Represents the origin of the AR session. |
| AR Session | Manages the AR session and provides information about the AR environment. |
| AR Session Origin | Represents the origin of the AR session. |
| AR Session | Manages the AR session and provides information about the AR environment. |
| AR Session | Manages the AR session and provides information about the AR environment. |
These components work together to provide a seamless AR experience. You can add them to your scene by dragging and dropping them from the AR Foundation folder into the Hierarchy window.
Creating Your AR Scene

Now that you have a basic understanding of AR Foundation, it’s time to create your AR scene. Here’s how to get started:
- Open the “AR Session Origin” component in the Inspector window.
- Select the “Session Type” dropdown and choose the type of AR session you want to create (e.g., “ARKit”, “ARCore”, or “ARFoundation”).
- Click the “Start Session” button to begin the AR session.
- Drag and drop your 3D objects into the scene.
- Position and scale your objects to fit the AR environment.
As you add objects to your scene, you’ll notice that they are automatically placed in the AR environment. This is because Unity uses the AR Foundation components to track the device’s position and orientation in real-time.
Customizing Your AR Experience
Once you have a basic AR scene, you can customize it to fit your needs. Here are some tips for enhancing your AR experience:
- Use the “AR Session” component to control the AR session’s behavior. For example, you can enable or disable plane detection, or change the tracking mode.
- Utilize the “AR Session Origin” component to position your objects in the AR environment. You can set the origin’s position and rotation to align your objects with the real world.
- Experiment with different rendering techniques to make your AR objects stand out. For example, you can apply materials, shaders, and lighting effects to create a more immersive experience.
- Incorporate user interaction by adding touch or gesture recognition. This allows users to interact with your AR objects in a more engaging way.
By customizing your AR experience, you can create unique and captivating applications that engage your audience.
Testing and Optimizing Your AR Application
Once you’ve created your AR application, it’s important to test and optimize it for the best performance